Monday, November 11, 2013

Seeing the light at the end of the tunnel

She says ignoring the train whistle in the background...

Back to sewing soon, I can feel it.

Securities and Exchange Commission quarterly corporate filing deadlines are this week, then my life returns to normal.
The good normal I mean, not the frantic, late night panic, rub your eyes and edit this spreadsheet normal.
Marfy 9462 pattern
What to do now?  


So many thing in progress, how do you chose?  I need to finish the blouse 9462, and then there are those pants sitting in a pile.


Free downloadable pdfs!
But, Marfy also has free patterns for download that need testing!  I'm lovin the jacket, the collar is so flattering.  It comes as a pdf, and I'm really liking the pdf patterns! I like the fact that yo can store them as a file and when you get ready to sew you know right where it is.

  • Downside: its a wierd paper size, A4???? I argued with the printer and finally got it to print on letter size., but it really, really wants size A4
  • Upside:  they use different colors for the lines for the different size!  Why didn't Burda think of this?
  • Upside:  only one garment per printing!  This is nice if you have ever been tracing a pant leg and wandered off down a sleeve.  You know who you are...

*sigh*  MUST FINISH ONE THING FIRST!  The blouse, must finish the blouse first!


I've also decided to buy a new machine, a Bernina 930.  Found one on Craig's List for $600 (with a nice table) but I wrung my hands, pondered and missed the boat.

Am I the only one who feels the emotional need to buy sewing things when I have the least amount of time to use them?  It somehow fulfils my need for progress.

I do need a heavier machine, I have the pieces of a gun-metal leather moto-jacket sitting in a box, and my cotton/poly/nylon jeans are wearing out. (FWIW, nothing beats good cotton denim, as heavy as your machine can handle it)

Back to work for now,
Don't forget to log in and get your free Marfy sewing patterns!

Thursday, October 17, 2013

Skirt love for Marfy 2280

Conservatively styled with cardi
I'm loving my latest version of Marfy 2280.
Its looking really cute and swingy.  I was worried that it would look too silly, or not appropriate but I can style it with a striped knit and a cardi for office chic.

I really rely on pockets in my day-to-day, so I am glad that I decided to add them.  The easy, cliche answer would have been brassy zippers with big brassy pulls, but as a middle-aged uber-vanilla accountant I really shouldn't try to pull off biker-chick. 

No really, I'm still too young for 'midlife-crisis' dressing.

Marfy 2280 pattern drawing
I love having the pockets, they are the perfect size and shape.  I can stick my stuff in them and they don't bulge or bag open.  They are much more stylish and convenient than those side seam pockets that I was considering.

I love that fall is finally here.  I broke out the boots, both tall and short.  I found only one pair of whole and wearable dark pantyhose leftover from last spring, but it was enough.
flippy and swingy
OK, by 'finally here' I mean highs in the 70's instead of the 90's, so its cooler.  Its short boots cool, not tall boots cool.  Oh, that cardigan is a silk cotton blend so its hardly cozy.

With blouse 2314 and long boots
I really do love the design of the skirt.  Its full enough to be comfortable to wear.  I can easily climb in and out of the truck.  I can also sit in a chair in an office full of people without feeling exposed, yet it is short and cute enough to not look dowdy.

I also like the look styled with long boots and a fitted blouse.


Now, back to that other blouse...

Maybe by the end of October I will be done with my September wardrobe.

Tuesday, October 8, 2013

My leather skirt pockets journey (lengthy and picture heavy)

*Disclaimer*
I specifically want to thank Kathleen Fasanella for her well written and informative Fashion Incubator blog.  Way back when I started my journey into leather sewing she wrote some very helpful and specific advice that couldn't be found anywhere else on the net.  Her blog posts explained the layout, grain, pattern placement and construction techniques necessary for success.
She also talked about a book called "Leather Fashion Design" by Francesca Sterlacci.  Most of the book covers topics specific to industrial design and manufacturing, but the sections on construction are really helpful.  If you wish to try leather sewing, you really should invest in a book like this.

Patterns aren't included and its more like a technique description than step-by-step instructions, but if you have a good overview of sewing welt pockets and can use your imagination this will get you to great looking pockets.

If you haven't sewn with leather or made any welt pockets I would like to refer you to another wonderfully informative blog written by The Sewing Lawyer  who has done a much better job of documenting her processes for leather AND welt pockets.  Follow her labels and learn.  If you don't return from the rabbit hole I will understand.  She made the most wonderful in-seam, invisible pockets in her jacket which she reviewed here on Patternreview.com!

This is a different process than inserting the pocket in a woven garment.

The stability of the garment allows you to sew the pocket together as one piece, then sew it into a formed opening in the garment.

Measure twice, cut once
The huge advantage of doing it this way is that you are adding fewer lines of stitching and you can see what you are doing from the right side as you sew.

Pause for a round of applause...

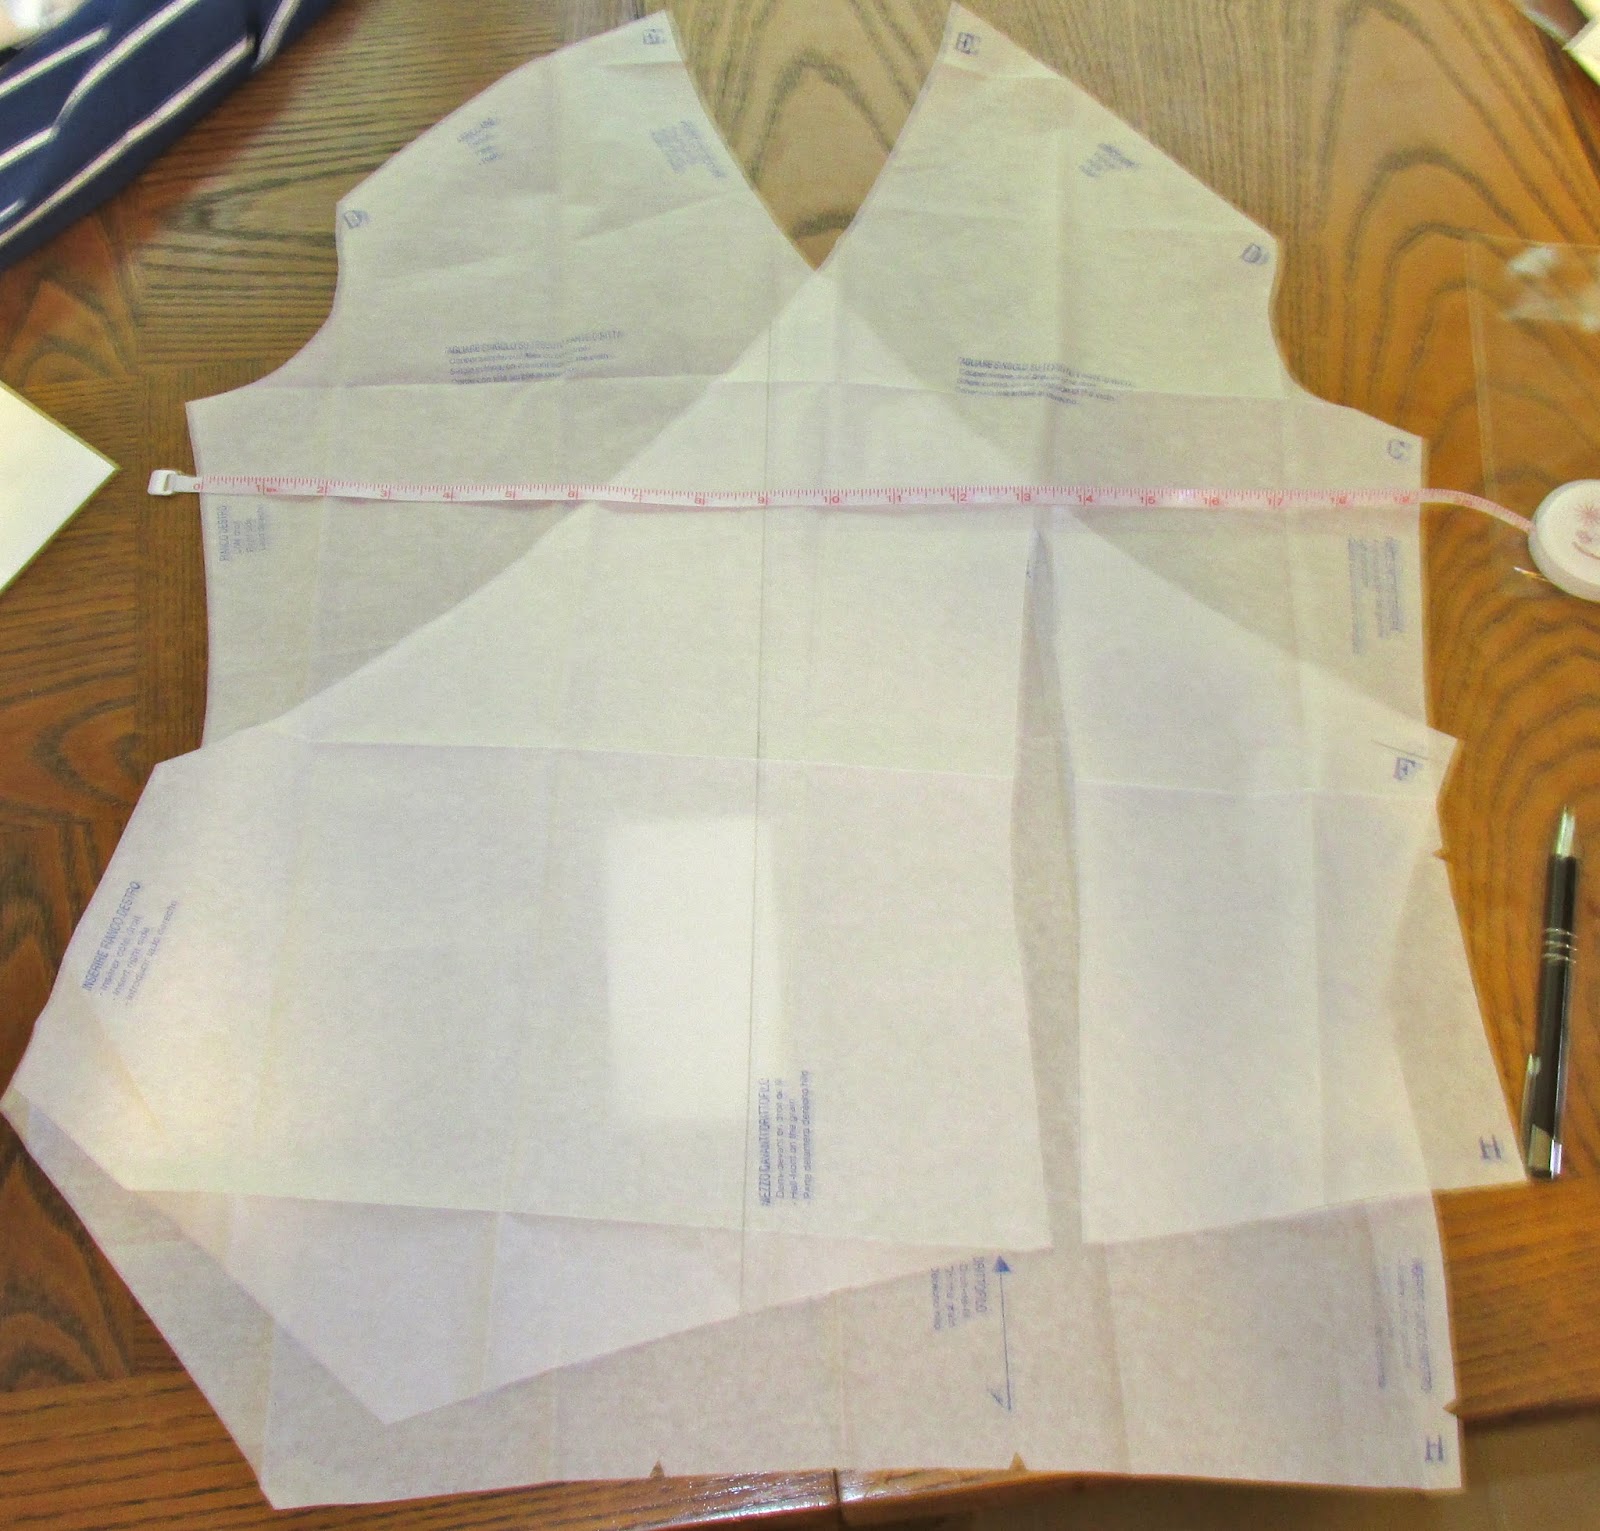
The lines for the pocket were marked on the leather with ResQ tape, the length and angle were eyeballed on the right side.
The line is transferred from the right side front to the left by placing one garment side on top of the other and sticking a
push pin through (same technique I use to transfer dart markings).  Then you really should double check with a nice big clear ruler to make sure that they look even.

Pin through both layers to match
Take a step back, rub your eyes, maybe get a second opinion but make sure that they are even and square because if you put them on crooked you can't change it.

Cut the pieces for the pocket:

2 welts in leather (length of the opening + 1 inch X width of welt x2 +seam allowance)
2 pocket facing in leather (length of pocket opening + an inch or so)
2 pocket lining in fabric (depth of pocket X width of pocket + 1") If your pockets are at an angle, the top edge of the lining should be straight across the uppermost point of the pocket.

OR, if it makes you feel better... grab a pattern with pockets that you like and steal borrow the pieces.

Fold the welts in half, pound with hammer, then glue.  Place one strip of Rescue Tape across the edge of the welt with the open side covered.

I think I cut the pocket lining straight, then folded the top edge down at an angle to match the pocket opening.  Then I trimmed off the extra triangle  leaving a seam allowance.

Sew the welt to the angled edge of the pocket lining.
Sew the pocket facing to the straight edge of the pocket lining.

Fold in half and press the bottom edge.

Next the instructions tell you to sew around the outer edge of the pocket bag so that you have a completed pocket.
Looking back, I should have waited because they aren't very clear on how you sew the bottom edge of the pocket welt to the bottom edge of the pocket opening.  They tell you to just start in the corner and sew straight across, but my pocket bag made it difficult to get my foot in the corner and sew
the seam straight.

Matching pockets ready to be attached to the skirt
But I was so proud of how pretty and well lined up my pockets were!

Attaching the pocket would have been much easier if I hadn't sewn the outer edge until after attaching the welt to the lower edge of the pocket opening.

Now you are ready to whack gently and precisely slice into your garment.
Inside of pocket opening


Pause for a  prayer to The Sewing Gods for the almost-completed garment that we are about to slice open.

Then you cut the pocket opening open between the strips of tape, being very careful to stop half an inch or so short of the end of the opening in order to make the 'Y' to extend the opening into the corners.

I was so enamored with my Rescue Tape that I used 5/8" tape to secure the lips of the opening to the inside of the pocket.

Then you peel off the final side of that stick tape and stick the right side of welt to the inside of the bottom edge of the pocket opening.

Make sure that the pocket is positioned so that the welt opens to the top of the pocket opening.

If you haven't sewn the pocket edge shut then its very ease to sew the lower lip of the opening to the edge of the pocket.  
Then you sew around the outer edge of the pocket.

If you have sewn the outer edge of the pocket, you sit back at your machine, scratch your head and curse quietly.

If you are smart, you unstitch the sides and refer to the smart instructions in blue above.

if you are not smart, and don't like ripping out seams...

Next you have to fold the upper part of the pocket (including the facing) back and finagle the lower lip of the opening under the presser foot and get as close to the start of the pocket edge as possible and stitch to the other end.

I would have taken a picture of this, but I didn't want to risk the skirt sliding out of the machine.

Next you only have to stitch the inner edge, top and outer edge of the pocket opening to have a well formed welt pocket.

Stitch sides and top of pocket opening
Think about it this way, the pocket opening is kind of like a 2 dimensional house.  First you sew across the 'foundation' to the lower pocket opening, trying to not sew through all layers and sewing the pocket shut.  Then you sew up the 'walls', across the top and down the other side sewing the sides and top shut.

I apologize if I wasn't clear or left out a step, but this process documenting is a tricky thing to do.

I am not writing this as a 'tutorial' or any kind of tried and true process, its just an account of my experience putting welt pockets in leather.  I found this method easier to do than the conventional way of sewing the half assembled pocket to the right side of the garment and flipping it to the inside.

Now, I just have to put the waistband (leather) on and sew the hem, write the review and I'm done.

I also think I'm prepared to get back to my gunmetal moto jacket which needs 3 pockets with zippers,  YIKES!

Thursday, September 26, 2013

Marfy Gold 9462, Wardrobe piece 3

Marfy 9462 circa 2005

Change of plans for the fall wardrobe!
I found this pattern in my stash while organizing patterns this summer.
LOVE LOVE LOVE!  Especially in yummy 4 ply silk from SMF

This is so 'me'.  It reminds me of blouse 1903 which is lovely and slimming, but not so practical.  The sleeves don't fit well under a jacket, and they make it a bit dressy for office days.  The fabric is also very light weight and flowy (which is perfect for this pattern) but I'm always afraid that I will spill something on it.


Marfy 1903 in Badgley Mishka print
So, 1903 doesn't leave the closet as often as it deserves and I hope to incorporate some of the wonderful things from it into 9462.
What I am proposing now is a harmonious marriage between 1903 and 9462.
9462 has a collar which makes it office worthy, but I will extend the length to match 1903.  Another change that I will make is to have it close with a side zip.  Anne the Clothing Engineer made a very lovely blouse from this pattern and used a side zip instead of buttons and a tie.  What a genius solution!  Why didn't I think of that?  This will allow the blouse to be a little more fitted and more secure.

You could put the right collar on a tank top and make it look like professional attire.

The length of 9462 come only 1/2" below the waist at 17 1/2" which is 4" too short.
It is also EXTREMELY fitted throough the waist to match the design. 

Marfy 1903
9462 Size 46:
B:  39.5"  ~ 1 1/2" of easeW:  30"  ~ no ease!
Back Length:  17 1/2" to the hem
Bust length:  11 1/2"

1903 Size 44:
B:  39" ~ 1" of ease
W:  32 1/2" ~ 4" of ease
Back Length:  21 1/2" to the hem
Bust Length:  10 1/2"

The front and back of both patterns compare very closely making it easy to meld the length from 1903 with the neckine and collar of 9462.

Comparison of 1903 (longer) and 9462 (shorter)
 Notice how much more fitted the front of 9462 is with the dart that is almost 2 1/2"!  I also notice how closely matched the armscye and shoulder line are!

I am unsure of the sleeves though, what sleeve design works well with 4 ply crepe that isn't long!  Full length sleeves aren't necessary in a climate that has high temperatures in the 60's all winter.

Marfy 2280
The 4th piece of my wardrobe plan is a leather and wool skirt in all black which I have been trying to document.  But as you can imagine, evening pics of black leather on black fabric look like the abyss.  I am using my favorite skirt pattern 2280.
I am making the side panels and waist band out of  black leather and the front and back centers and pleats (both are one pattern piece in an 'L' shape) out of black wool twill.
Sewing leather to fabric has turned out to be so easy.  You don't use pins, you use binder clips to hold the fabric and the leather together.  You sew with a leather needle.


Monday, September 23, 2013

Marfy 2314 tie-neck blouse, wardrobe piece 2


Must finish one before starting another...  Is much harder than I thought.
Scary September is hard!  I vowed to challenge myself to finish SOMETHING before starting anything new and I have been doing fairly well.
Marfy 2314 front

The pants are still in a time out sitting in the corner.  I need to spend some quality time with them and not rush.  I won't take too long, 3 pairs of pants with lining makes quite a pile.

I am very happy to say that I am done with the blouse!
There is Marfy Alchemy totally at work here!
Ugh!  Thank goodness for the alchemy, I don't look an ounce over 180 lbs *grimace*.  Its funny how it takes 6 months of work to shed a few, but they pop right back up in a matter of weeks.
Getting old sucks!  Oh well, back to the diet and exercise!

The pattern is a size 46.  It measures Bust 40 1/2", Waist 35 1/2" and about 22" length.  The length to the bust point is 10 3/4" and the back waist length is 17 1/4"

I do love the pattern, it went together like a breeze.  The fabric is a silk charmeuse-like jacquard from Fine Fabrics during one of her wonderful 50% off sales.  Those lovely polka dots are all the rage this year, but I'm not sure its really me.  The dots seem a bit cute-sy.  But, I think that it works overall.

Marfy 2314 back
I chose the shorter, bracelet length sleeves over the long sleeves, they really need a contrasting fabric to accent the inset.  The sleeve length is perfect for my drafty office, even though my arms are a little heavier than I had planned *grimace*.  Lately I have adjusted for a 15 1/2" sleeve, this one is a bit tight so it looks like I have grown and need to shrink!

I did shorten the tie by and inch and make it narrower by two inches.  I also cut several inches off one end so that it can be tied like a men's tie knot instead of a dreadful bow. It works best with the light weight satin or chiffon as suggested, if you are making it in anything heavier you might want to make it narrower.

Recommended fabric aside, this would be very cute when done completely tongue in cheek with a menswear cotton shirting, a collar and men's tie fabric.  Hmmm, an idea for up-cycling from thrift stores perhaps...

I know that just about every pattern company now has a version of this blouse, but I trust Marfy.  I have the Syle Arc pattern, and I started to compare the two at work at lunch, but the HUGE pattern paper was too big for my desk.  I really appreciate the conciseness of Marfy's pre-cut, single size pieces!

Wednesday, September 11, 2013

Phooey! Pants fly madness

I got through the fly on all 3 pairs and I don't like any of them, and so they will be ripped...

I think I need find wider zippers, with wider zipper tape for one thing.

If you don't like it, you won't wear it!

Rip, rip rip...

Does anyone know of a good trouser zipper tutorial?  Quick and easy to read is a must, otherwise I might as well be reading the old BWOF instructions.

I used the Stitches and Seams tutorial by Debbie which I have used so often before, but my zipper tape isn't wide enough for a nicely proportioned fly!  I don't want to order a yard of Riri, its expensive and the pulls are bulky.  But, there is nothing more frustrating than having to replace a zipper!

Immediate fixes:
-I think the gray ones are OK, but i will look at them and think about it
-The navy pair has a fly that is too narrow, wider zipper is necessary
-The black pair at the bottom, I love the fabric, its too light weight and probably needs underlining or interfacing, plus the stripes are crooked on the right side.  (Rhonda, this is the fab fabric that I got when we were at High's)

So much for my "Stepping out of my Comfort Zone" pledge to myself to not start another project until I finished the first... I'm on to the Marfy polka dot blouse with the tie front, I'll post pics soon.

I'm putting the pants aside until later in the month, its just time to spend some time apart

Wednesday, September 4, 2013

The best things in life come in 3s

BWOF 07-2009 102
I have talked about multiples several times and I'm going to start a short walk-through of the process.
BWOF 07-2009 102
It helps break the monotony of those necessary things that don't get the sewing spidey sense tingling, but they keep me decent under those cute tops and jackets.  A good pair of dress pants (out of good fabric) made with good (1 1/2") seam allowances will last 3 or 4 years. These are from 2009 and were also made in three.

For me, what makes the longevity of the good fabric vs. cheap is how well it recovers from a seam.  If it recovers well, you can take in and let out or replace the lining as often as you need without leaving that cheesy perforated line or pressed fold.  I also look for colors in the same color family so I don't have to change thread.

The given here is that you have to start with a TNT, mine is my evolved BWOF 7-2009.  I size up for my 44" hips and 36" waist, but other than that it really works.

Pin line marking shortest end
The only extra step that you must remember when laying out the fabric is to mark the end of the shortest piece.  If you don't do this you may end up losing and entire pair.  when you layout one pair at a time, you can just feel where the other layer ends, but I have always found it necessary when laying out several garments at once.
Oh yeah, I am shortening the front crotch length by about half an inch.  Yes, I did press it before cutting.


 Since there wasn't a lining pattern, and the pockets are cut-on with L-shaped pockets, the lining pattern must include both the upper front piece and the pants front.  I simply laid the upper front (pocket piece) over the pants front when I cut across the top of the lining.  As soon as you get all the pieces cut you are ready to start the fun part.

For me the key to saving time with mass production is to assemble in short steps and complete the same step for all pairs before moving on to the next step.  Right now I have stitched the back dart and started the front pockets.  After the front pockets, you sew the fly's, then its like you are almost done!

Monday, August 26, 2013

Sewing plans for fall

Its that time of the year again, Labor Day... the beginning of fall.
The most welcome time of year in Texas because the temperature no longer spikes in the triple digits, and the mornings are a balmy 77 degrees.

We joyously make plans for fall wardrobes.

Break-out our winter sweaters (short sleeved, cotton of course) and our winter coats (in cotton and you guessed it, short sleeved) and move those tank tops and shorts to the second drawer.

Time to put away your white tank dress and bring out the black one with the cap sleeves.

The patternreview.com wardrobe contest begins September 1, and this year there are 4 garments required for the month.  Surely I can put together 4 pieces, right? 

Maybe.
I already have 2 of the 4 pieces laid out, all I have to do is hold off on cutting until Sunday.  The pants are my go to pants pattern from BWOF 7-2009 as seen here.  I made 3 pairs back in 2009, but I've worn the lining out of all 3, and one pair has a hole in the seat.  So, I took apart the pair with the hole and laid them out on 3 different pieces of fabric.  I have navy, black pinstripe and gray.  The black pinstripe should go with the wardrobe.


Marfy 2314 layout
Marfy 2314 was suposed to be with last years wardrobe, but I lost the pattern...  this year I plan to make it with the shorter sleeves, in red polka dots from Fine Fabrics.com when she had a rare sale. 

This lays uncut on part of my HUGE desk at work.  Being able to sew at work is a great incentive to bring lunch and not go out and over eat.

The other blouse is a metamorphasis of Marfy 2315 with the left side duplicated.  I like the drape on the right side, but I'm not sure how well it will wear.  For the picture above I sliced the drawing in half and pasted 2 left sides together.  I love the red chiffon with shear sleeves and red underlay for the body.

The skirt is Marfy 2280, my first one is in navy leopard on the right.  I love this skirt, super easy and I will even shorten it a couple of inches.  It will look good blocked in black an white (as I grabbed from Pintrest).

I love the tweed for the dress, especially if I can work out some black leather or red trim. We'll see, its pretty bulky.

That's it for the wardrobe plans.  Last year I completed 2 out of the 4 garments, this year I'm shooting for 3!

Subject to change of course...


Saturday, August 24, 2013

New Look 6871 - How the other half lives

Wore it to the office yesterday with skinny jeans and cork wedges.
It was the third work day for me, and the third new outfit.

Conversation with the executive assistant over morning coffee:

She:  "Oh, another one?  I hate you.  Love the color"
Me:  "thanks, I think.  It was pretty easy"
She:  "Seriously?  Just once I would love to hear you say 'Target, sale rack' like most people"
"Why?"
"Because then I could swing over to Target and grab one, or we could at least go shopping together.  Now you've go your own little clothing island going on and nobody's invited."  "The rest of us just sail by on the department store ferry and wave at you and your perfect fitting clothes."

The coffee was done, she rolled her eyes and went back to her office (desperately crying out for and FBA and a shorter hem).

Its easy to feel like the weird little 4H kid in 4rth grade when you grow up in home-made clothes.  Aren't we trained to just say thank you instead of admitting that we made it, by hand, and we loved every minute.  What do you say when someone asks you where you got that dress?

From The Selfish Seamstress
For one thing, I am rethinking the way I thought that garment sewing was perceived.  Maybe they really are just a little bit jealous.

I'm also rethinking my choice in coffee cups, as pictures on the right:

Either way, I'll keep sewing, wearing my sewing and bragging about it.

Maybe I'll stop walking around with the cup so much, but I'm keeping it!

What do you say when someone asks you where you got something that you made?  Do you dodge the question?  Do you lie?

Love the simple top.  I could have bought it at Target, but then it wouldn't be out of this stretch silk.  Its really awesome.  OK, I made it for comfort, not flattery or figure disguising curves and I nailed it!

One thing I gained from Me-Made-May Flicker photo group is that I need more casual, weekend clothes and this is a great addition.


Friday, August 23, 2013

More instant gratification - New Look 6871 and more

Sorry, no pictures yet.  My camera battery was dead.
But for once the fabric is still available as well as the pattern!
I love the fabric, just a splash of bright bright pink.  Really, its almost neon.
How often do neon colors come in style?

Its super soft, just a hint of stretch.

The pattern is super lose and comfortable.  In fact, some of the pattern reviews say that its the perfect maternity top.
Kwik Sew 3593 circa 2008

But there is something to be said for that...
I was recently cleaning out my sewing room and came across this green top Kwik Sew 3593 from 2008!  I had 'shelved' it because my serger took a bite out of the fabric.  It happens to the best of us.
I found the top and stated wearing it again.  Hey, it was a Saturday afternoon and I was going to Kroger's, how dressed up do you have to be for the grocery store.

I love the top, but don't exactly care for the pattern.  There is a bit of pulling under the arms as you can see with those diagonal lines.  You wouldn't think that a top like this would need an FBA (or at least I wouldn't, but then I'm new here) because its so lose, but you do see some pulling under the arms for several people.  Why is this such a common problem for this style of top?  I noticed it with reviews of that popular HotPatterns Weekender top.
My top really isn't so bad when my hands aren't on my hops, but I do notice it.

To respond to a couple of comments, the pants are from BWOF from July of 2009, and that about when I made them.  I'm making more, 3 more pairs.  I took apart the pair with the hole in the seat and laid them out on 3 layers deep.  I would be totally ready to go if only I could find the waistband.  Did I mention that I cleaned the sewing room...
Thank goodness I still have the magazine.

I will post more on my great master plan of making multiples of wardrobe basics later.

Also, its mini-wardrobe contest time of year again... Hmmm.

Thursday, August 22, 2013

Did I mention that I love MARFY? reason 2415

Not much to say really...
This was a quick sew.  Including the separate side back pattern (which I integrated into the center for only 1 back piece) there only 4 pattern piece.  That includes separate front pieces!

When I first took this out I thought it was ridiculous for a knit pattern.  There is a dart in the right front side, and those pesky side back pieces seem like overkill for a pattern whose only suggested fabric is jersey.

But it works like a charm: 
The shape skims my waist.
The neckline doesn't pull or gape.
The asymmetrical hem slims and drapes elegantly without looking contrived.
The shoulders gather without bulk.

Pattern with coordinating markings
I laid out the pattern before I cut and it didn't even look like it would fit together.
But I looked at all my beautiful Marfy clothes and decided to trust them.  I cut it pretty much as is, except I cut a shirt tail hem.  I like these better, I hate sitting in my office chair typing and wondering if there is some sort of wardrobe malfunction going on behind me.

Muslin you say?  Who me?

I don't need no stinkin' muslin, I sew with Marfy.

The pattern measurements for a size 48:
Bust:  39 1/2
Waist:  35
Length is 22 1/2"

When I make it again I may add a couple of inches to the length and see how it looks.

I may also try it in a winter color in a woven fabric with print, and sleeves.

I have one more shirt to finish this evening so I hope to post again this weekend.  I have also started the boring job of making 3 more pairs of these gray pants.  The lining is worn through and torn and I have managed to ruin 2 other pairs over the last 4 years.  Its been 4 years, they don't owe me anything!
Its my go to pattern from BWOF July 2009.

I really appreciate all of your kind comments and feedback, its helps keep the blog posting.

Wednesday, August 21, 2013

Meeyooowwww Kay Unger 1329

Back to sewing, right where I left off!

This dress from my last post (Vogue 1329) worked out even better than I thought it would!
I took some cues from what I like in RTW, I made it more fitted than the previous post pic and I made it shorter.

I think the look is much more slimming.  Instead of just color blocking the front, I also color blocked the side back on the matching side.  If you will look at the picture in my previous post, you can see the black side front and the print showing through right behind it.  I've seen this in other reviews of this dress and in RTW and I personally think it looks a little awkward.

They made this pattern with a center and side back  which I think is a bit much for a pattern that calls for stretch fabric.

I think having the same color in the back side is more slimming and looks more uniform.

I wasn't sure if the leopard print would be over the top so I chickened out and wore it with a black jacket to work.  This kicks it up professionally and subdues the print.  I swear, in office light the jacket looks ore black than navy.  There is an upside to never being let out in direct sunlight, the blacks always match in fluorescent lights.


The other pattern that I have started and finished since we last spoke is a Marfy (couldn't stay away too long).  2415 is one of those unobtrusive tops that they slipped in with a jacket so great that I barely noticed the top.  That is until my fellow Fashionista Rita ordered it.

Did I mention that I finished it already?  In deep blue silk jersey from Universal Fabric Center In Rice Village.
I should be able to post pics when I wear it tomorrow.

All in all, I had a great 2 day sew cation.  I really need to do that more often.

Just in case you were wondering...

The key to uninterrupted sewing power
I know that I have been away for awhile.  We've been busy as a family working in the yard together.  After the last hurricane in 2008 when we lost power for 10 days, we decided to install a backup generator.  So, since I didn't want it sitting right next to the house we put it at the back of the yard.  This meant that we had over 100 feet of trenches to dig by hand for the natural gas and electric lines. It was a good way to get some sun and get myself in shape.  While we were in the trench digging mood, we ran irrigation lines from the house to both ends of the garden which runs all the way around the back yard.  This is the rock garden side, I promise the other end has a batch of tomato plants and fruit tree and looks much more impressive.

Yeah, its the white box in the middle of the picture. It doesn't look like much, but its the magical thing that supposedly keeps the house running (Air Conditioning included) during any power failure.  It runs on natural gas and is hard wired to automatically transfer for continuous power whenever the electricity is cut off.

Tuesday, June 18, 2013

Something fitting- Patsy and Kay Unger

Vogue 1329
So, I got my dress basted together and it doesn't fit as bad as it could have.
It can come in more at the waist and hips, but I didn't want to take a chance.  I think I need to recut the black piece and place it to match the corresponding front black piece.

I like the print though.  I also like the white yoke even though that is just muslin fabric.  I'll recut it later and line it so it isn't see through.  I think I will also see how it looks extended over my shoulder a little.

I also need to keep exercising. I'll see how this looks fitted before I determine if its too much print for me.

The Colette pattern is looking better too.  Diane was awesome.  How great is it to have a friend who can help you fit a silk charmeuse shirt!


Colette Jasmine
It needs to be more shaped at the waist and have the hem straightened, but it there is hope.

I also think that it may drape well if I let it hang overnight (or so) and let it drape.  From my experience, bias tops kind of drape and adapt as they settle in shape.  At least the ones in good fabric do, by that I mean tightly woven and heavier fabric.

It also still has to bulky 2" seam allowance poofing at the sides.  Right now the seams are just basted.  When I get the seams to where I want them I will trim the SA's down to about 1/2" (for french seams) and pull out the basting threads.  this should mark the seam lines nicely, but not too permanently.

Thursday, June 13, 2013

Vogue 1329 Fabric / pattern serendipity

Vogue 1329 'natural' pose
I bought this pattern the day it came out:
Vogue 1329
Kay Unger has some pretty neat and stylish designs that they aren't afraid to sell to home-sewers.  I have made a couple of her patterns and they have earned my trust.
This has been sitting in pergatory (pattern stash box under the ironing board) awaiting the perfect fabric.  Something with a little bit of stretch for comfort, but natural fibers for steamy summers.

Then one morning Roz posted this and the stars came into alignment!

58" wide, 97% cotton 3% lycra, 100% serendipity!

With matching black (even down to the fiber content) for the side panel.  I think I will use white cotton for the top part, and maybe extend the shoulder for a wider shoulder line.


Ta Da!
The only question remaining is the lining.  I have a bemberg addiction, but no stretch.  So, I am thinking of cutting it on the bias for more give.
I also need a secret, inseam pocket somewhere, or a welt on the side with the print.
I have pulled and measured the pattern pieces and what I came up with is within 1/2" of what is stated on the pattern.  Even though the description is stated as 'close fitting' there is close to the standard 4" of ease Bust, Waist and Hips.  That's fine, at least they admit it on the pattern measurements.

I could also go totally off the reservation and use gunmetal gray leather for the yoke.  Or, black and white plaid cut on the bias.
Do too many voices speaking at once turm a fashion statement into a fashion argument?


Wednesday, June 12, 2013

Seriously? -Colette Jasmine

I'm all about supporting the independents, really I am.
I will chose independent restaurants, fabric stores and grocery stores over giant corporations any day.
Jasmine
So naturally after my first Style Arc success I am moving on to Colette,  because Me-Made-May 2013 really showed their popularity around the world. On any given day, someone somewhere is wearing a Colette Sorbetto top.

They also sell patterns in pdf format (for $12 instead of $16) which suits my instant gratification compulsion just fine.  Besides, the Jasmine is just ME.

I printed and taped the pattern.  Then I checked the size chart and picked 14.
At this point a careful reading of the instructions shot.  Apparently some patterns still include seam allowances.  Go figure...

Jasmine / TNT comparison
So part of the hugeness is my fault.  Not all of it!

I compared their pattern to my favorite version of my favorite Marfy 0692 free pattern from forever ago and the difference is big!  Colette is very proud of their skinny ease (I read that somewhere on their website, can't find it again), but when I measured the actual pattern (even without the SA's) I came up with 4"!  The armhole is substantially lower then my TNT.  Their is no way that the picture shown above follows the true pattern ease.

Did you notice that the bust, waist and hips aren't marked?

Jasmine facings
There are some other issues as well.  I noticed in some of the reviews that the contrast neck doesn't fit well and a dart was needed.  The back neckline pattern is used for the tie, and it really doesn't look right.  The top is on the bias and the facing is not, but that doesn't really explain this poor fit.

I like the fabric, don't love it, but it seems to fit the pattern.  SO, if I can't get it to work its a lesson learned.  But, its a nice concept, pretty picture.
I'm getting help from my fitting buddy Diane tomorrow so I'll post more pics.

Until then I have about 3 other projects going on so, on to the next.

I also got my birthday present in the mail today.  I'm going to learn French by Rosetta Stone!
Speaking of birthday... I have to finish 20.5 hours of Continuing Professional Education by the end of the month in order to maintain my license to count.  Yay me!  Texas Board of Public Accounting, ruining birthdays state wide!


My Blog List